Raynet CRM Integration – All Calls in One Place
Raynet CRM is a smart online tool that helps companies organize contacts, business opportunities, and customer care more effectively. It gives you an overview of all important information, so you do not have to search for data across different systems.
To make your work even easier, we have connected Raynet to our phone system (call center). This means you can now see all calls with clients directly in Raynet – without switching between applications or looking for records elsewhere.
Contents:
What Will This Integration Bring You?
- All calls in one place – incoming, outgoing, and missed calls are displayed directly in Raynet.
- Call notifications – you will immediately know who is calling you.
- Call recordings – calls are automatically saved to Raynet, so you can play them back at any time.
- Option to log in/out of queues – you decide when and which calls you want to receive.
- Automatic and manual call logging – calls can be added to the system automatically, even when you are not currently logged in to Raynet (for example, while you are on the road).
Thanks to this integration, you have all important information in one place and nothing slips through the cracks! 🚀
Also take a look at our YouTube channel, how to integrate Raynet CRM with SEVIO, where all videos are neatly organized in one playlist.
Integration Setup
You can find instructions on how to set up an account in Raynet here: https://raynet.cz/jak-zacit/.
Next, we will show you in six steps how to connect SEVIO and Raynet CRM.
Step 1 - Displaying Raynet CRM Settings
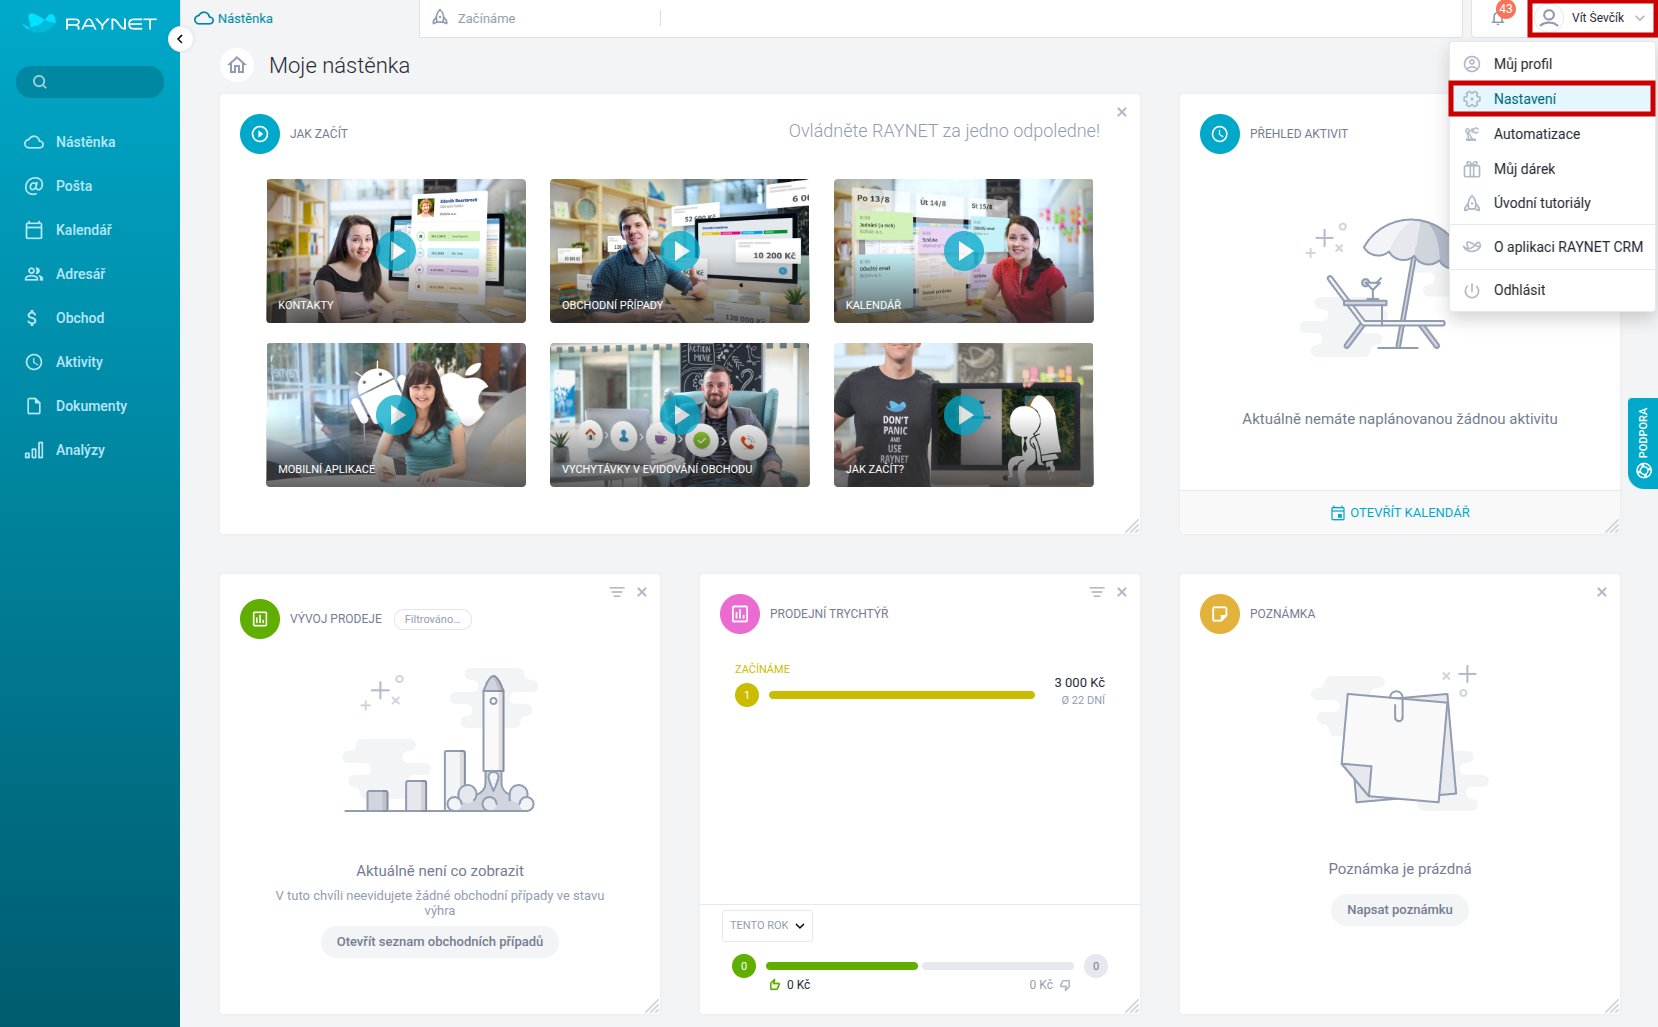
In Raynet CRM, click your name in the upper-right corner and select Settings from the drop-down menu.
Step 2 - Selecting a User in Raynet CRM
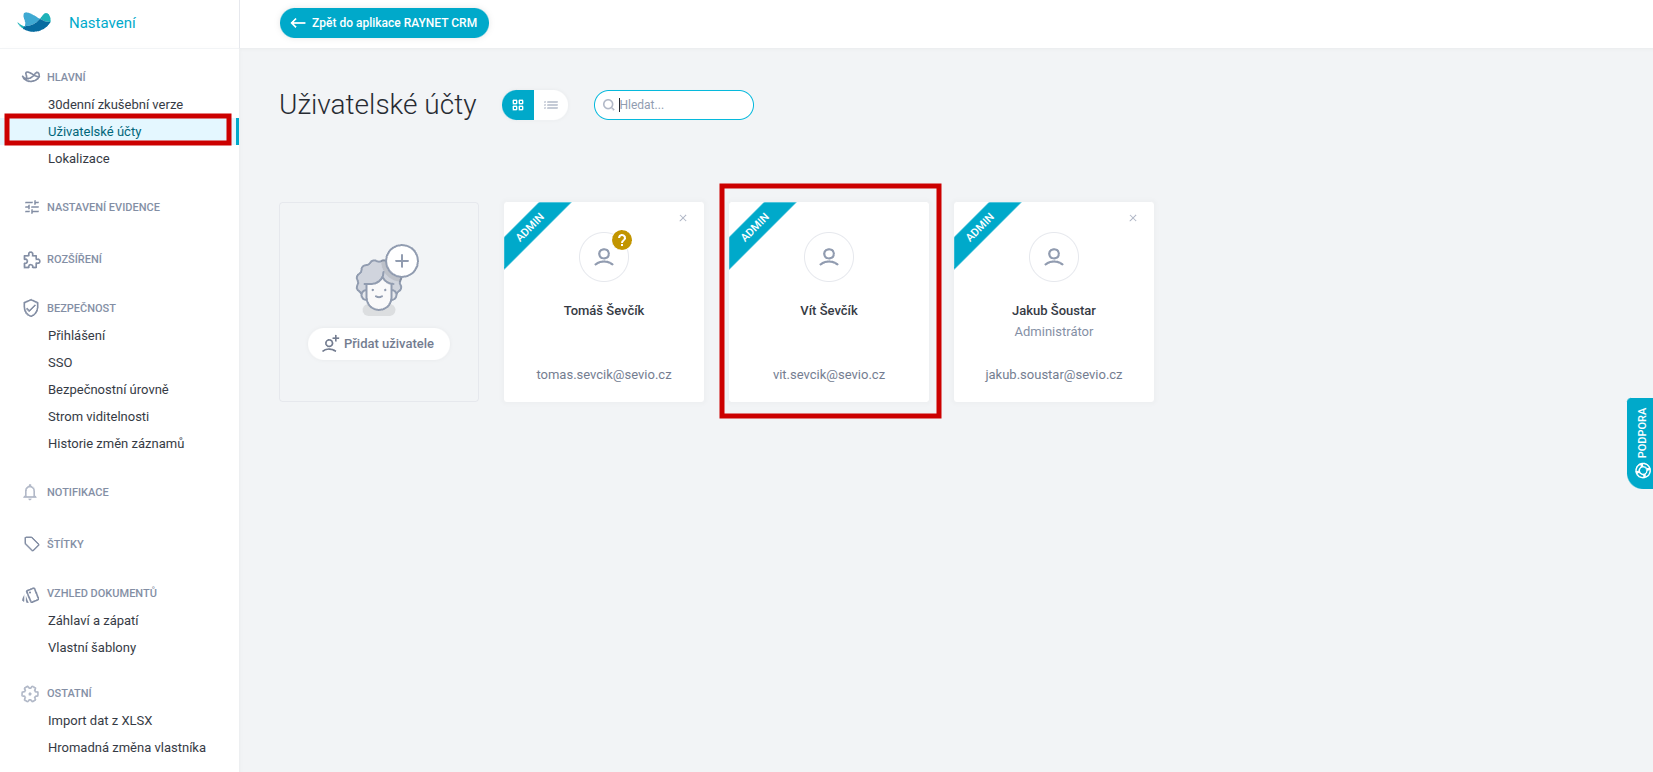
Select the specific user for whom you want to set up the connection to the phone system/call center.
Step 3 - Creating an API Key for Raynet CRM
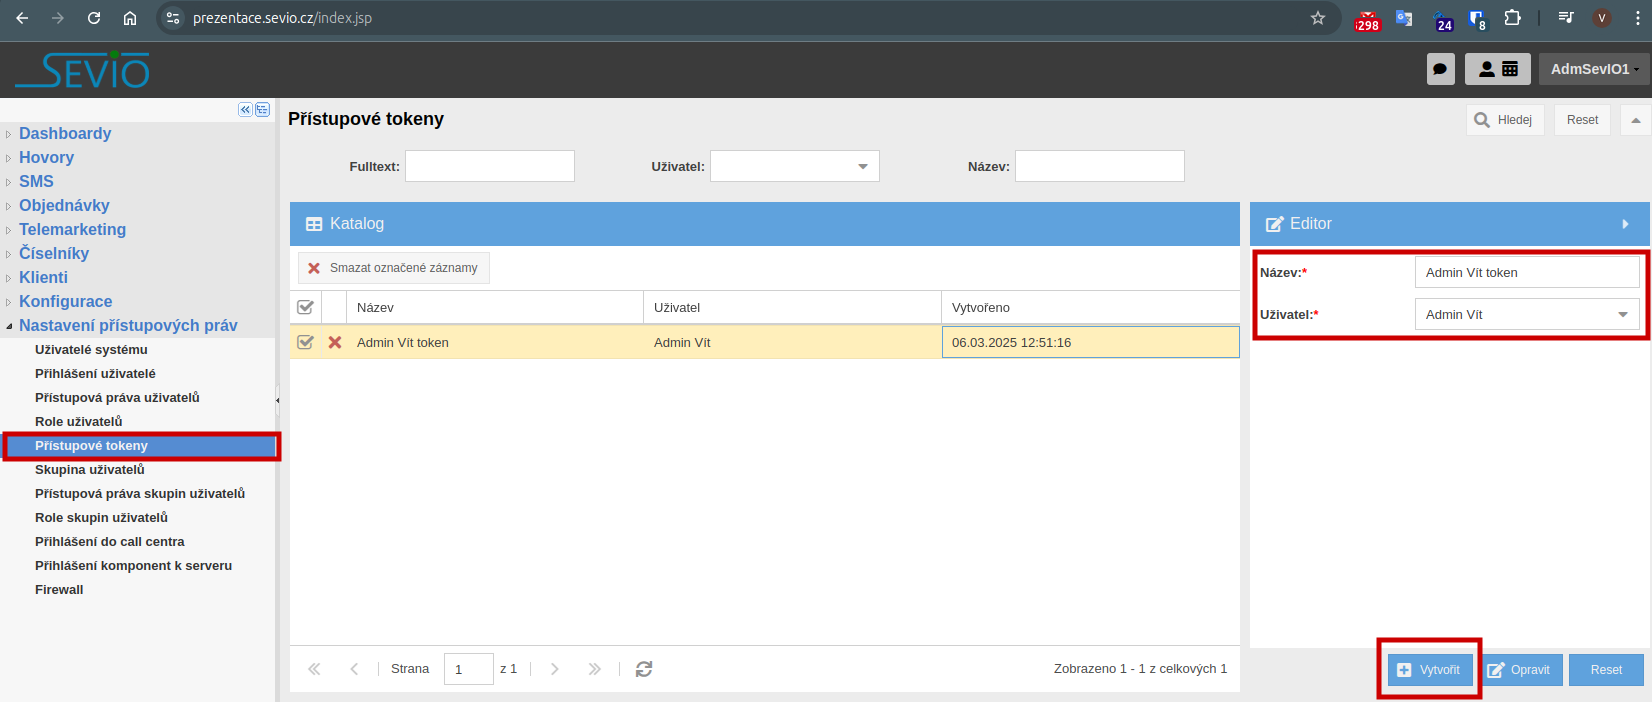
In SEVIO, open the Access Tokens module and create a new record - an access token that you will then enter into the form in Raynet CRM.
Fill in the form on the right side of the screen:
- Name – any token name – choose one yourself.
- User – select the user for whom you are creating the token.
- Click the Create button.
A dialog window will appear with information about the new token. Copy the token value and save it somewhere. You will need it for insertion into Raynet CRM.
If you forget the token value, nothing happens. Delete the created record – the token – from the table and create a new token.
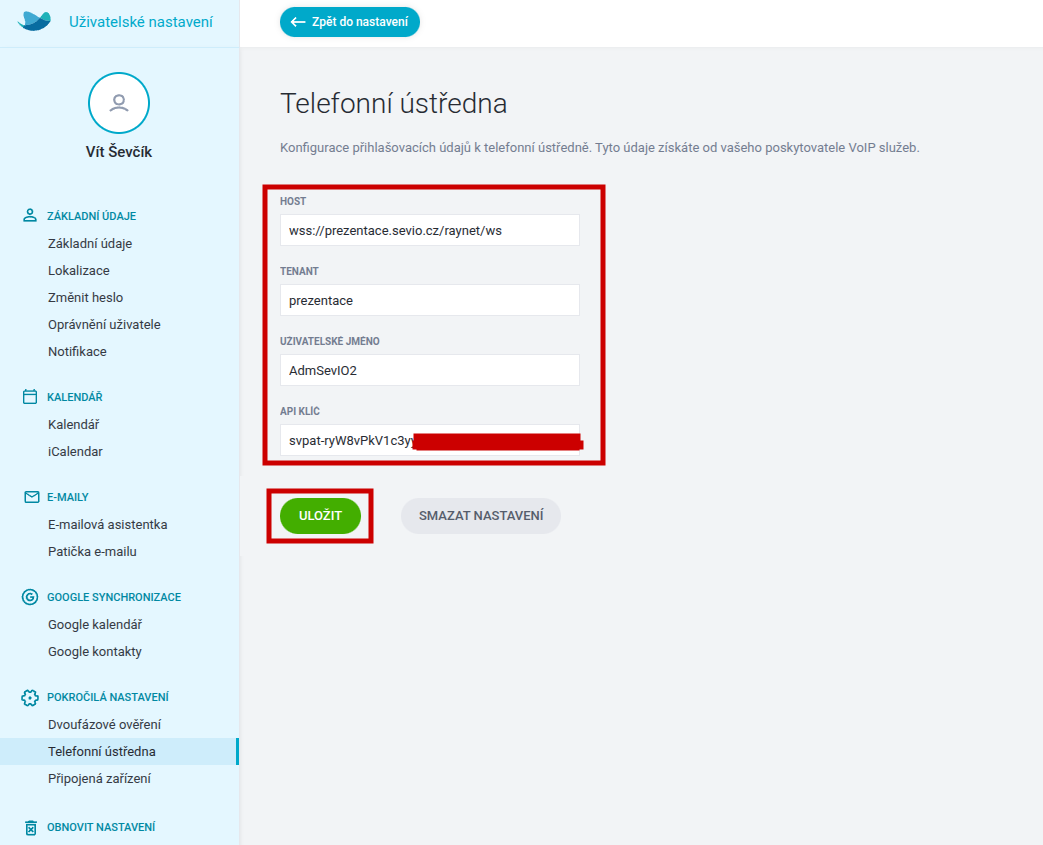
Now, for the selected user in Raynet CRM, set the following values in the Phone System section (the API key must first be generated in SEVIO; see the image How to Set SEVIO Login Credentials in Raynet CRM):
- Host: the address of the SEVIO phone system, which you receive during handover: wss://vasefirma.sevio.cz/raynet/ws
- Tenant: any value; this field is optional
- Username: the login name for the SEVIO phone system. You enter it on the login page.
- API key: the API key that you generate for the given user in the SEVIO phone system in the Access Tokens module; see the second image. After generating it, do not forget to save the API key immediately; it will disappear after you close the window.
- Click the Save button.
Step 4 - Logging in to the SEVIO Phone System in Raynet CRM
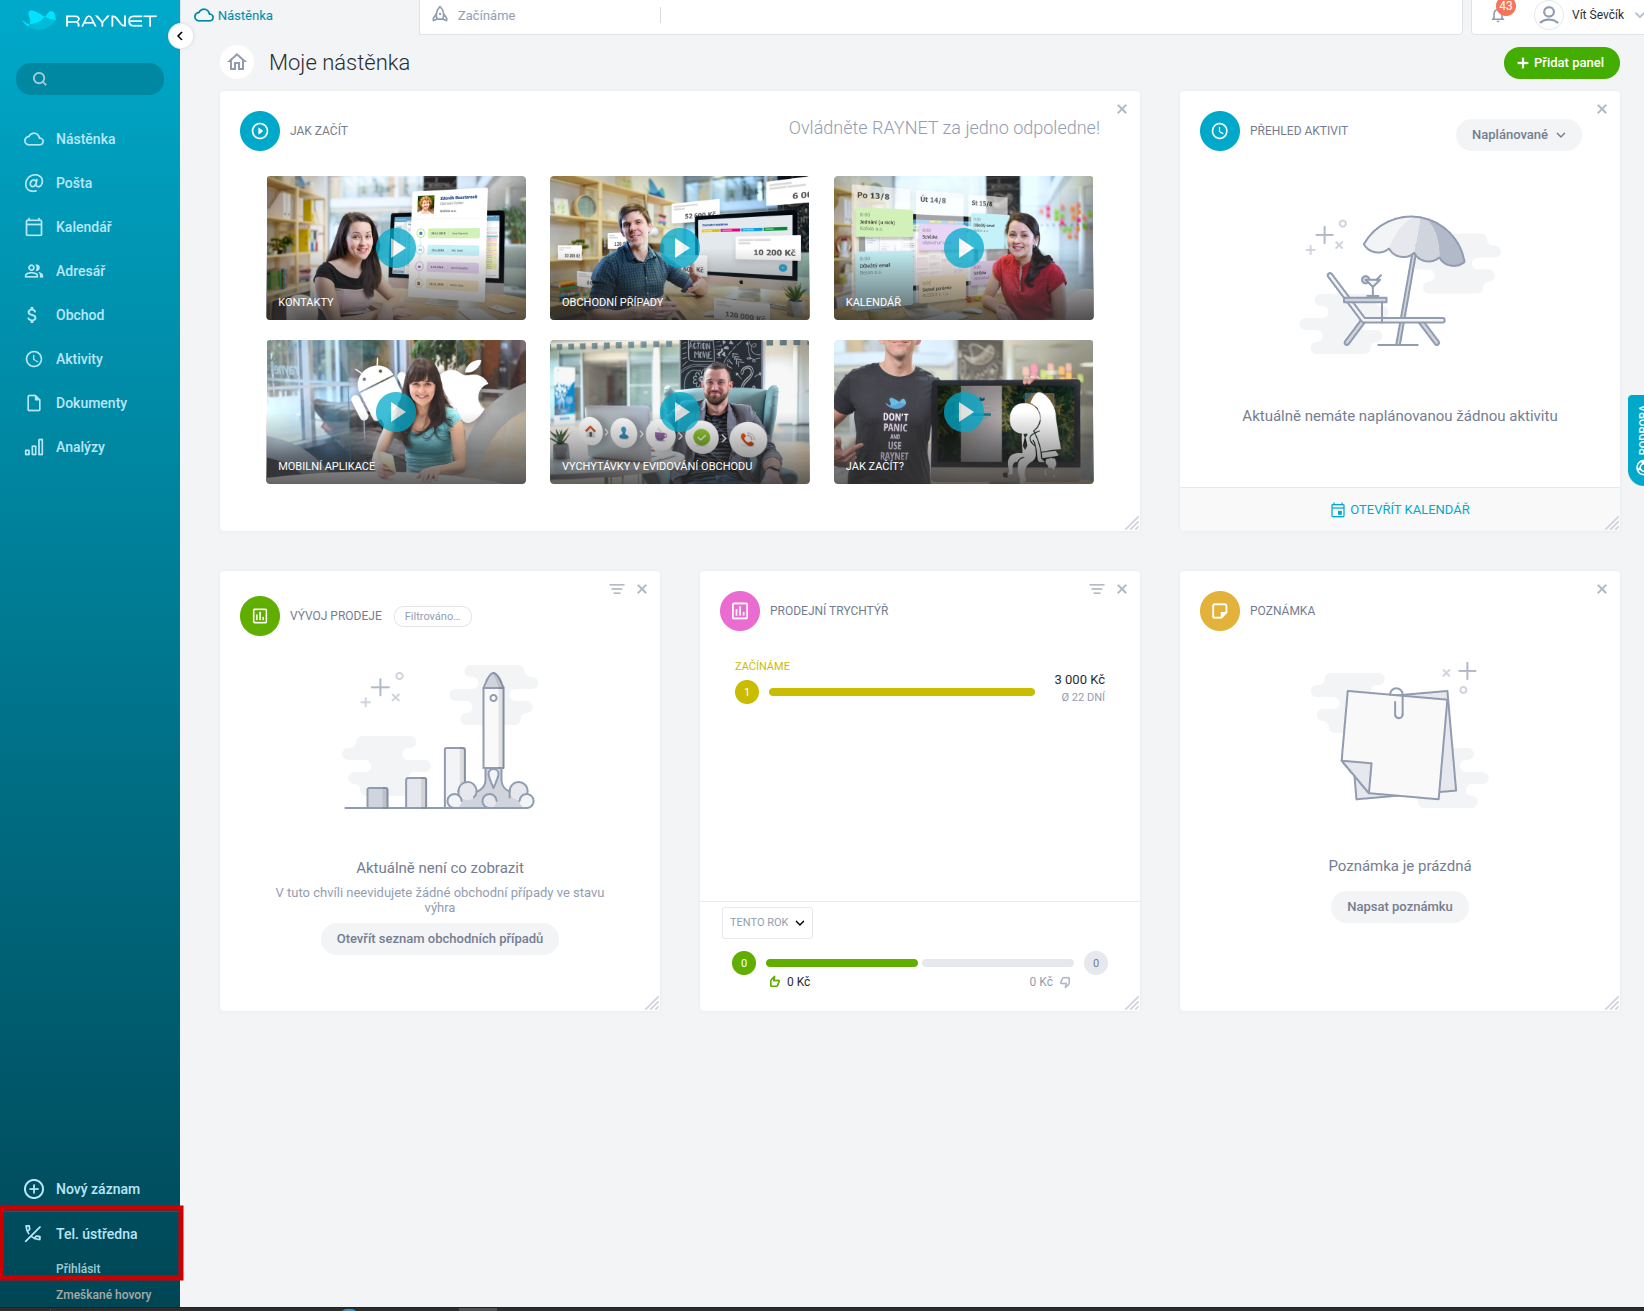
After saving the configuration, return to the Raynet main page. First click the Phone System button in the lower-left corner. Then click the Log in button.
Step 5 - Selecting Queues and the Phone You Are Working On
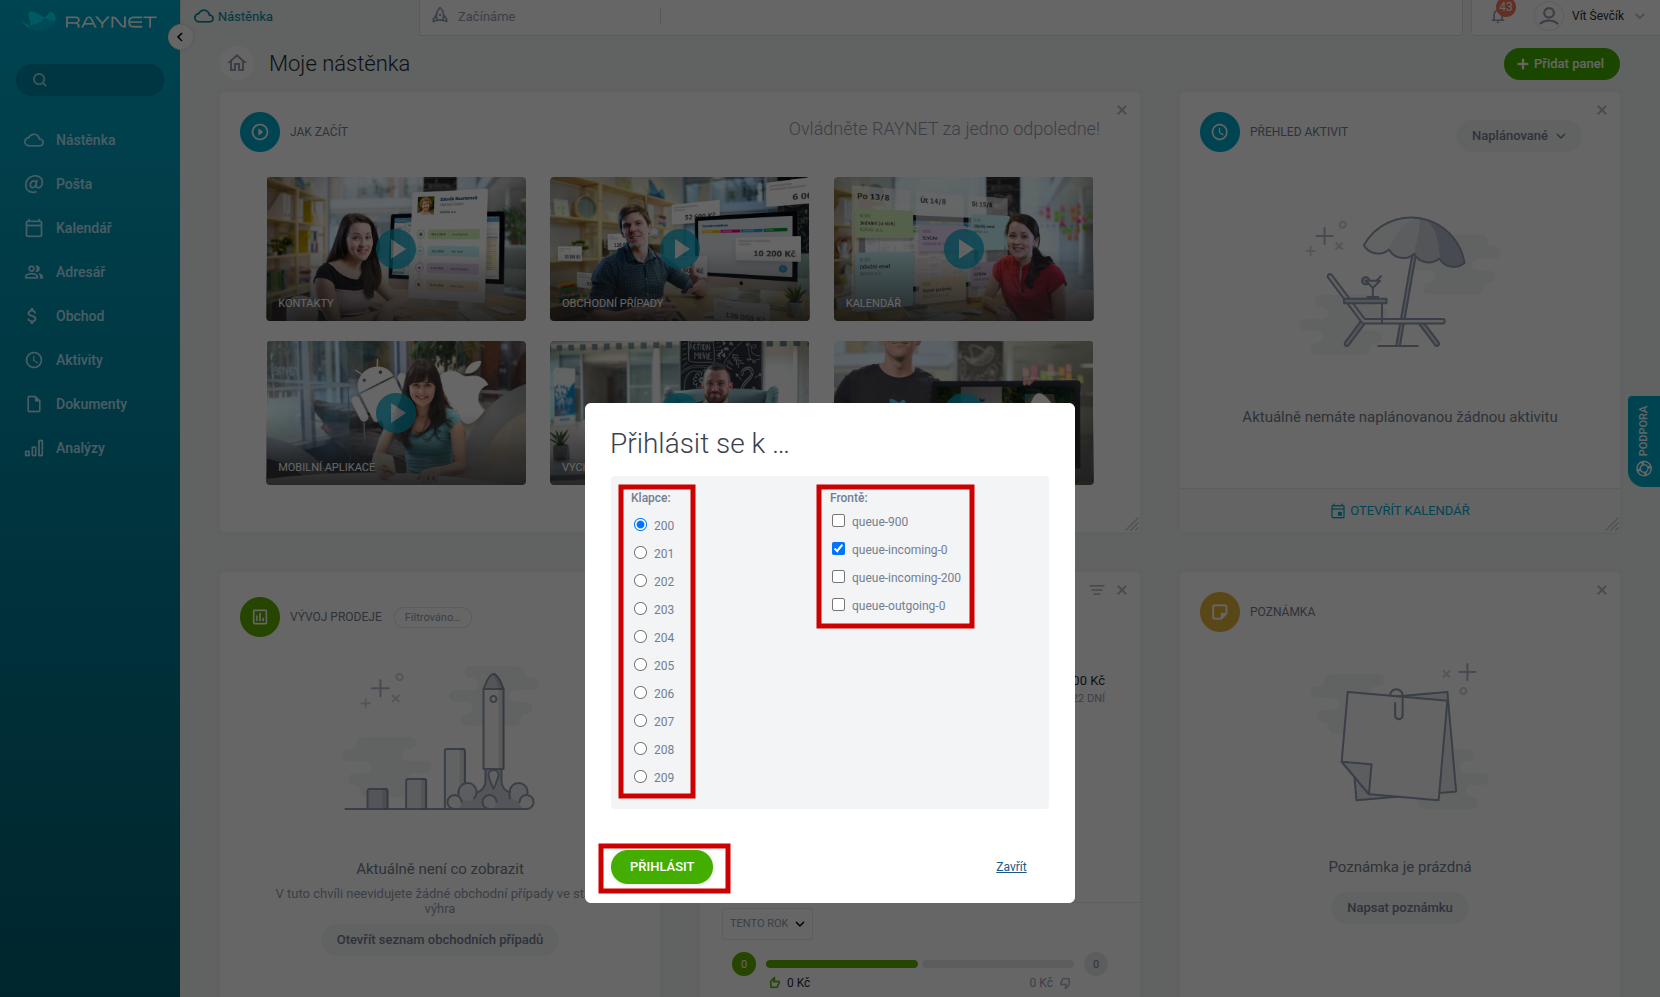
Log in to the given extension (the extension is set in the software or hardware phone) and to any queues, if needed (based on your phone system settings).
After the form for selecting the queue and your phone line appears, select the phone line and tick the queue names in which you will work.
Click the Log in button.
Step 6 - Completing the Login to the SEVIO Phone System
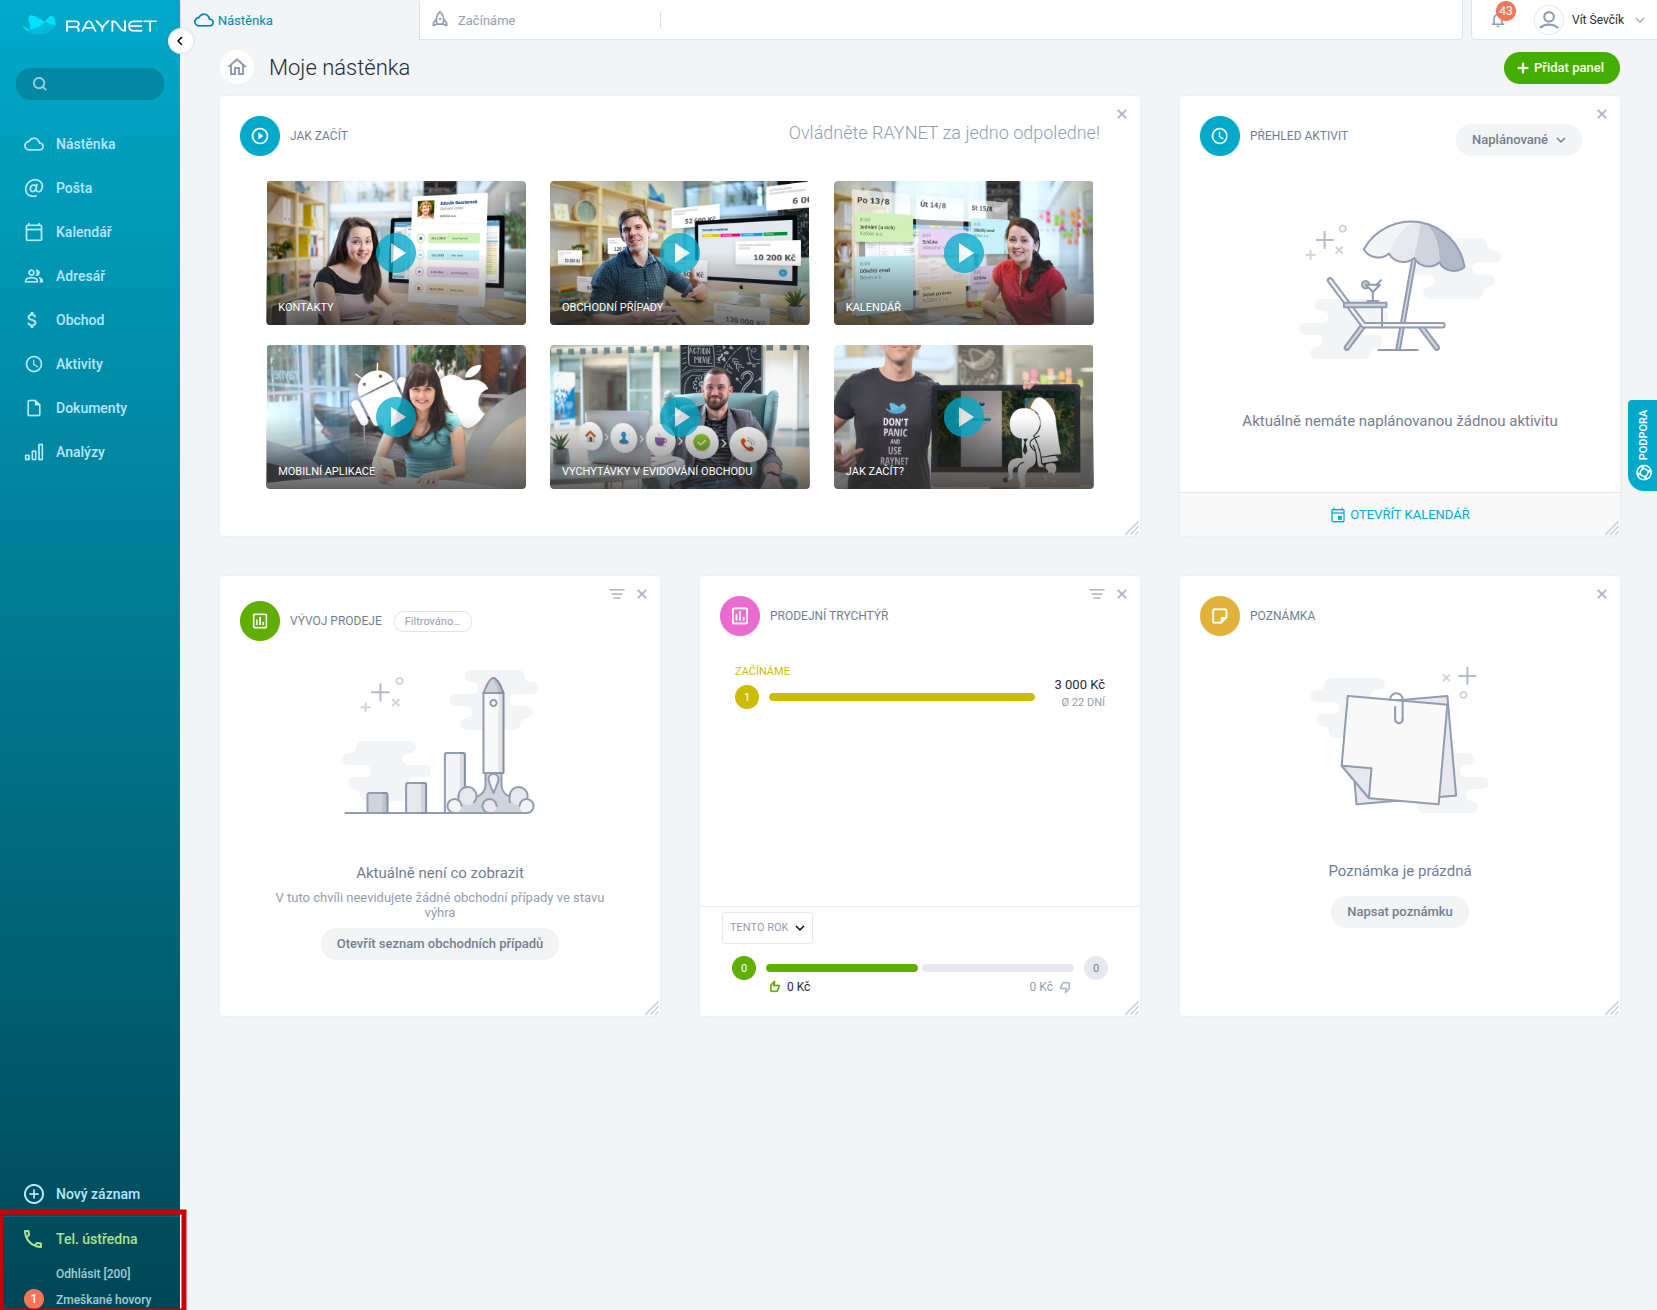
Congratulations, you are now successfully logged in to the SEVIO phone system in Raynet CRM - the Phone System button is green.
If you want a link to the call recording to be generated automatically for calls, you still need to set the Raynet API key in SEVIO. Please see the Automatic Call Generation section.
Missed Calls
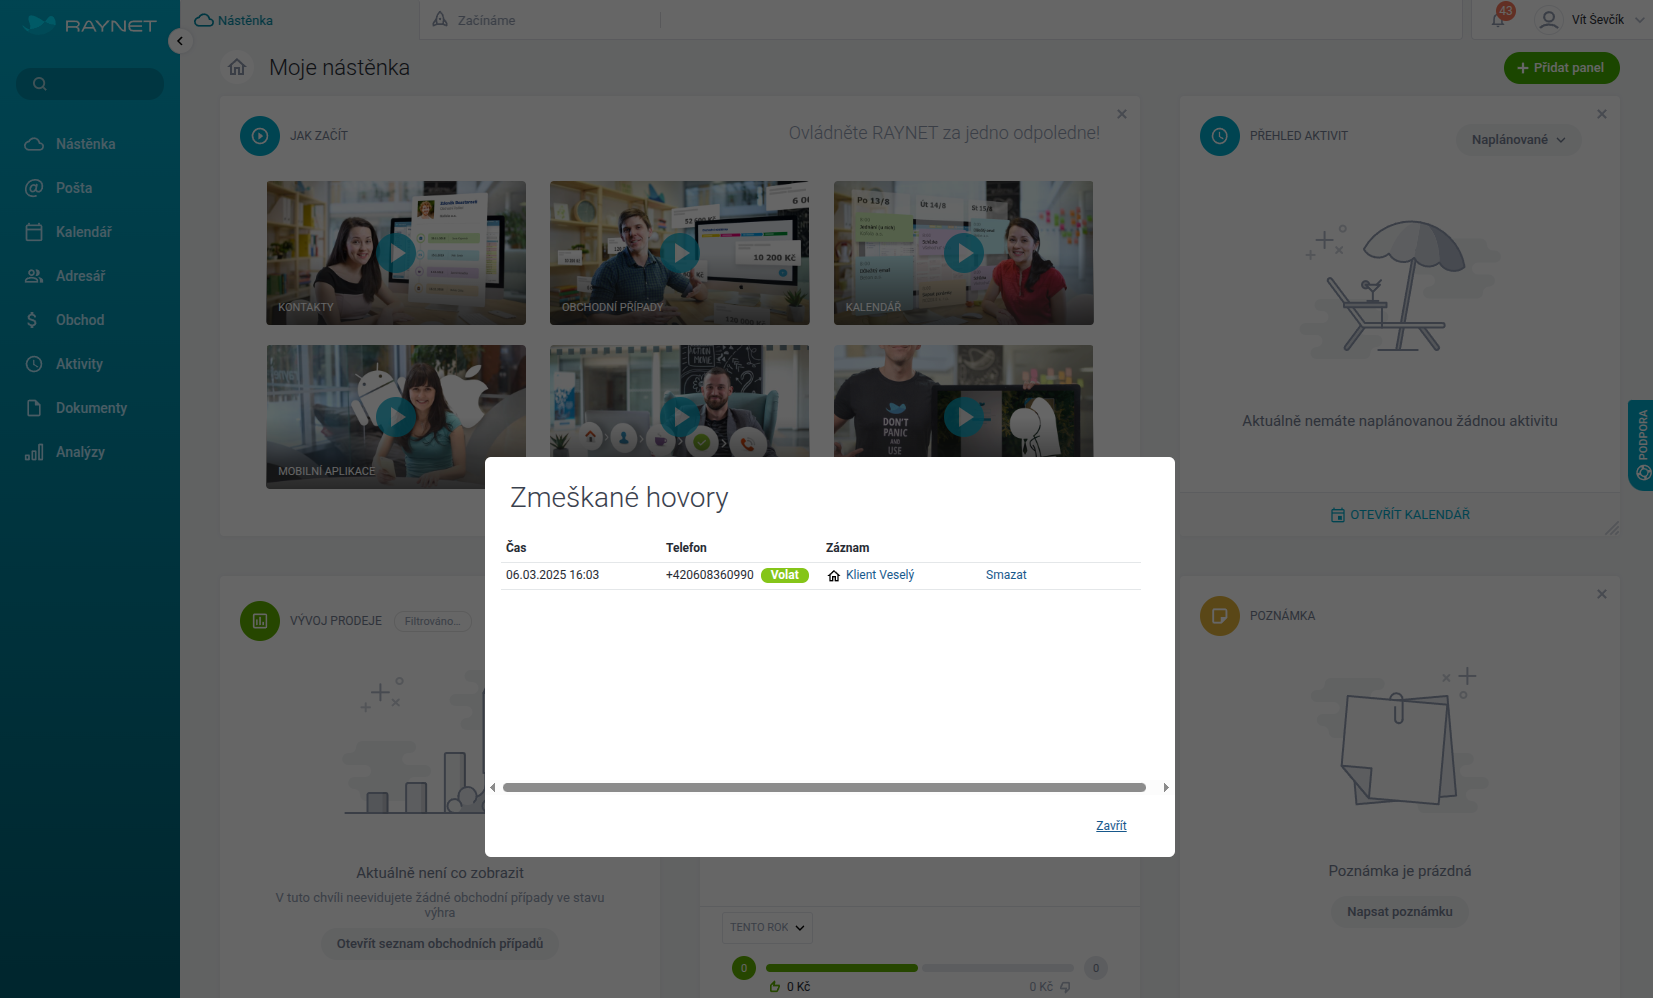
In Raynet, missed calls can be displayed by clicking the Missed Calls button in the lower-left corner (see step 6, image Completing the Login to the SEVIO Phone System), after which the following table will be displayed.
Manual Call Generation
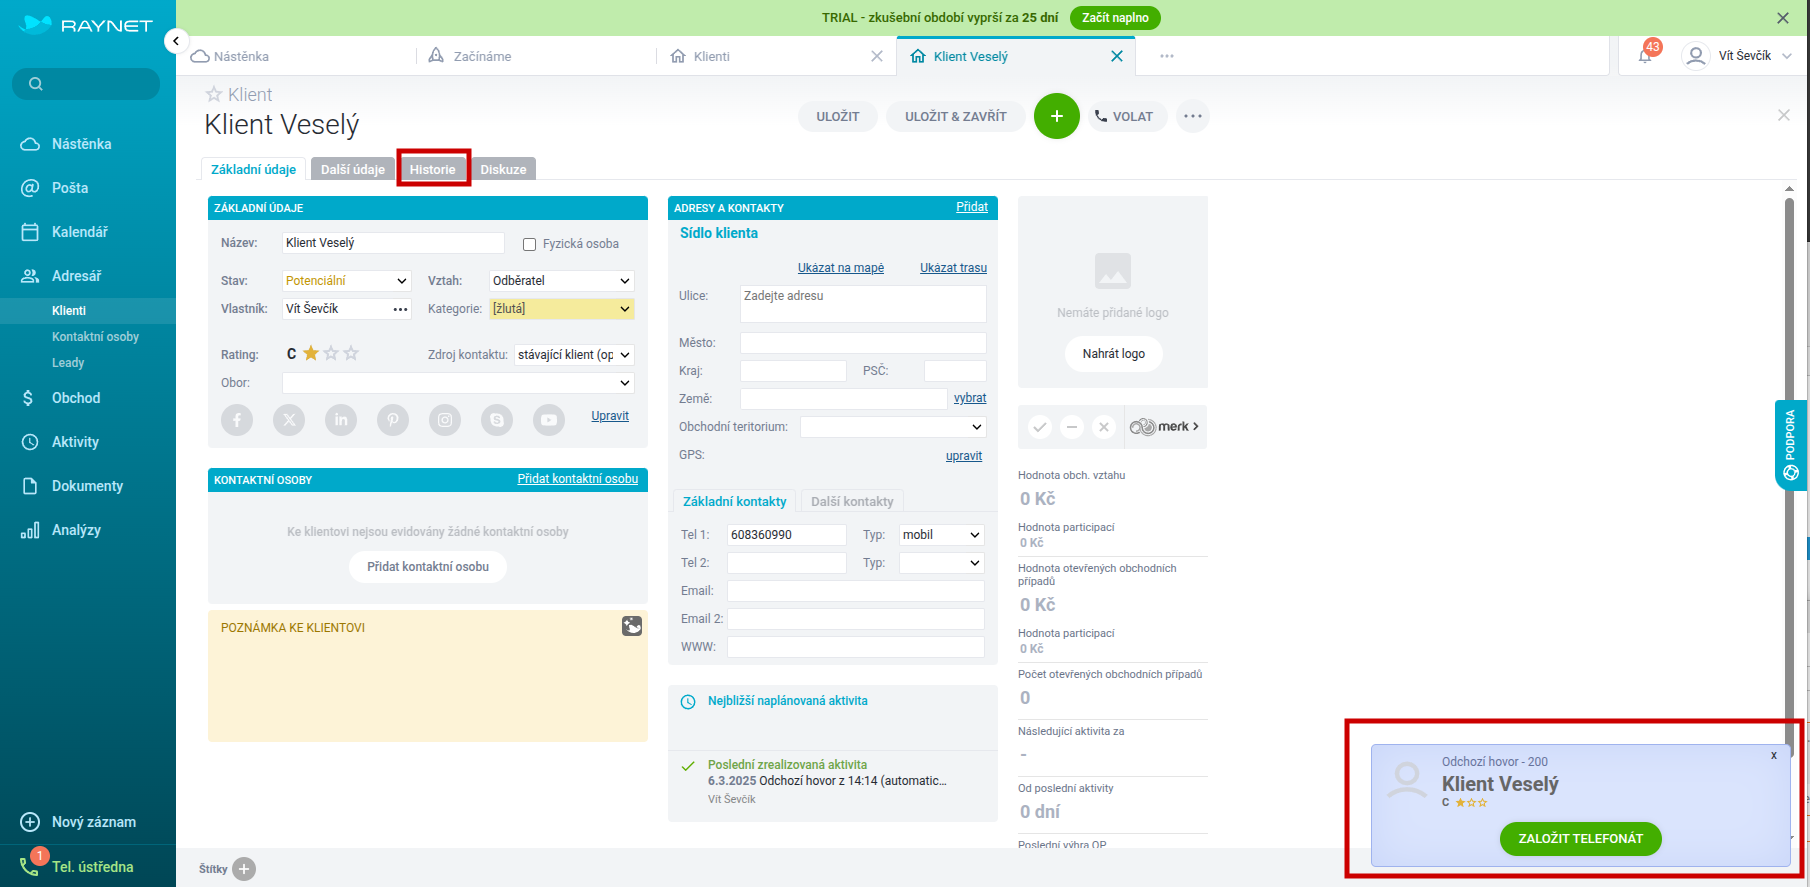
After the connection is set up, you can manually generate calls (more precisely, a call activity) by clicking the bubble that appears in the lower-right corner during a call.
For incoming calls, the client card is displayed automatically. For outgoing calls, you can access the client card by clicking the bubble in the lower-right corner.
You will then see all activities in the History section; see the image below.
Automatic Call Generation
SEVIO works closely with Raynet and can generate calls automatically without the user having to be logged in to Raynet.
All you need to do is enter your Raynet address, Raynet login, and API key into SEVIO. Nothing more is needed.
In the following three steps, we will show you how to generate an API key in Raynet and then insert it into SEVIO.
Step 1 - Generating an API Key in Raynet CRM
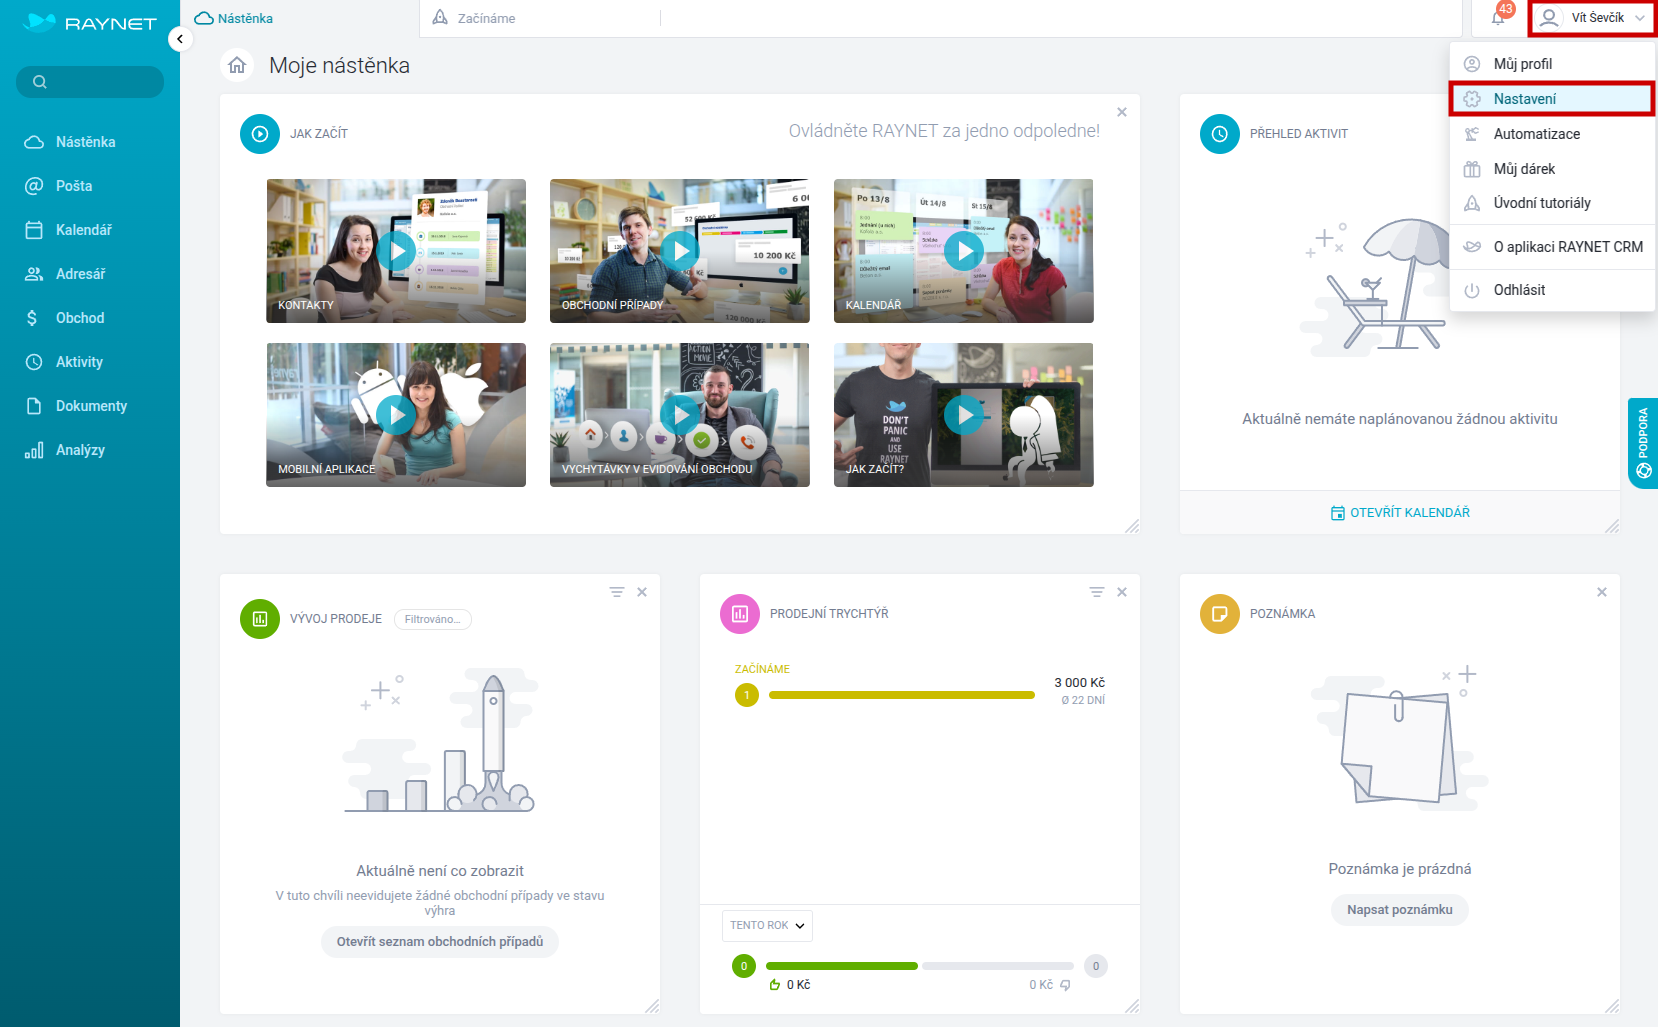
In Raynet CRM, click your name in the upper-right corner and select Settings from the drop-down menu.
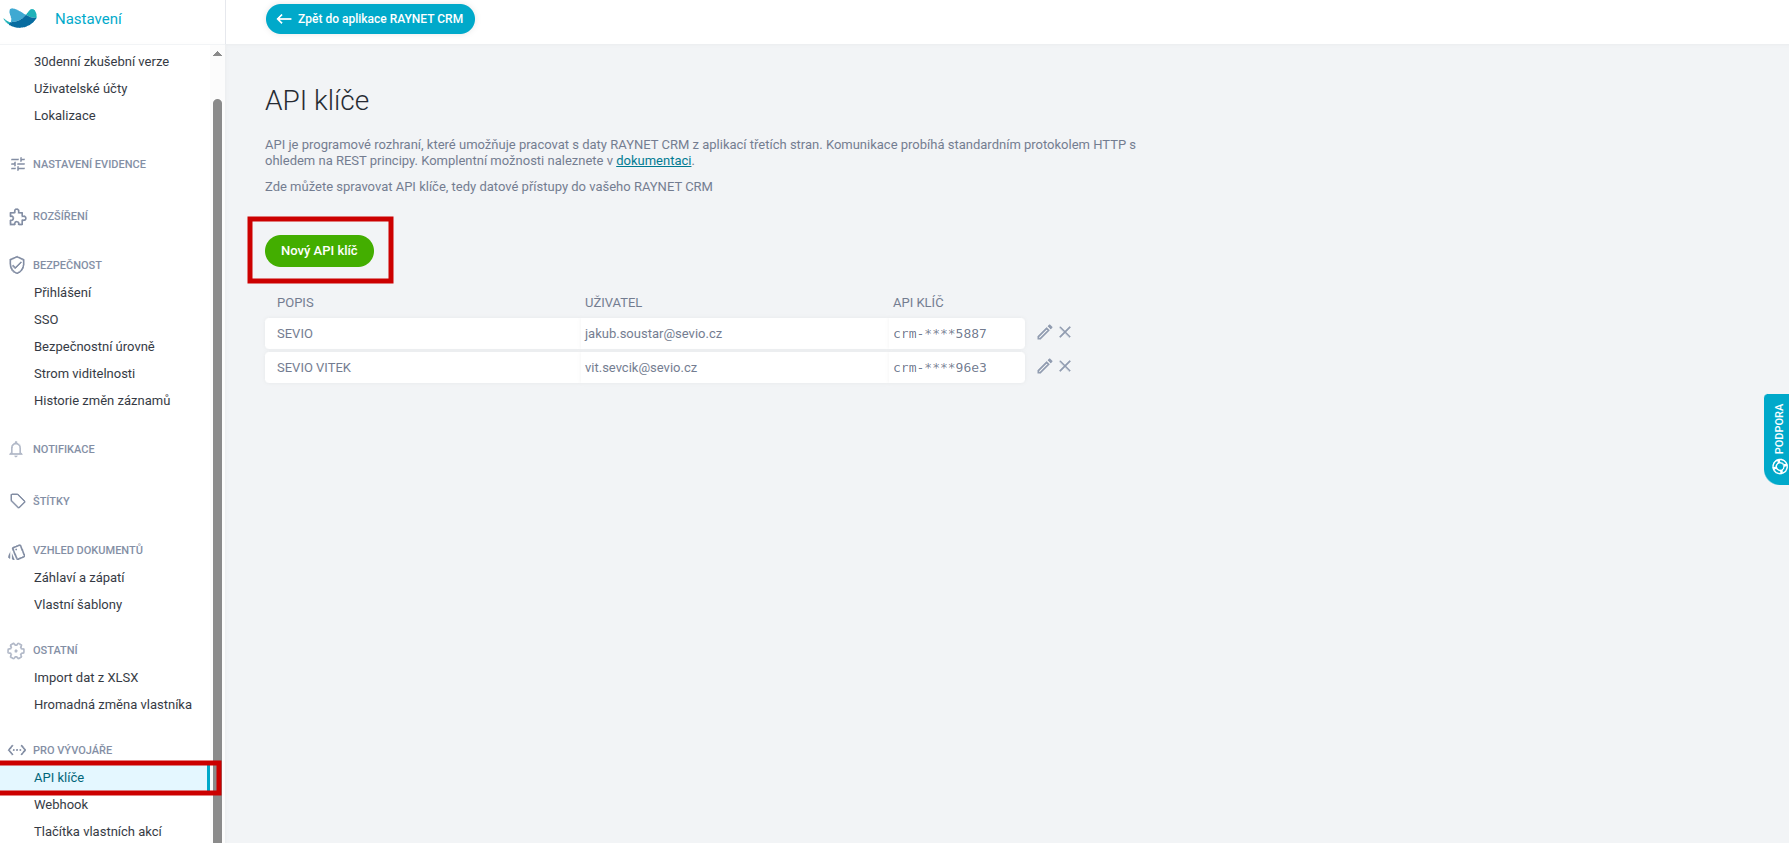
Then go to the API Keys section and click the Create API Key button.
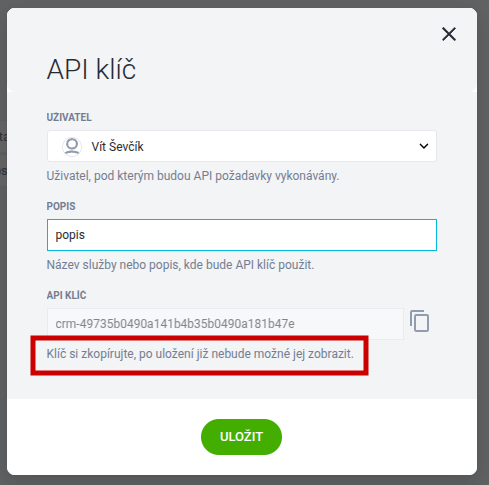
A window will appear where you select the user, enter an API key description (any description you want), and copy the API key by clicking the rectangle icon next to the text field. Then simply click the Save button.
Step 2 - Setting Up SEVIO
SEVIO now needs to be configured so that it can automatically generate calls and links to recordings.
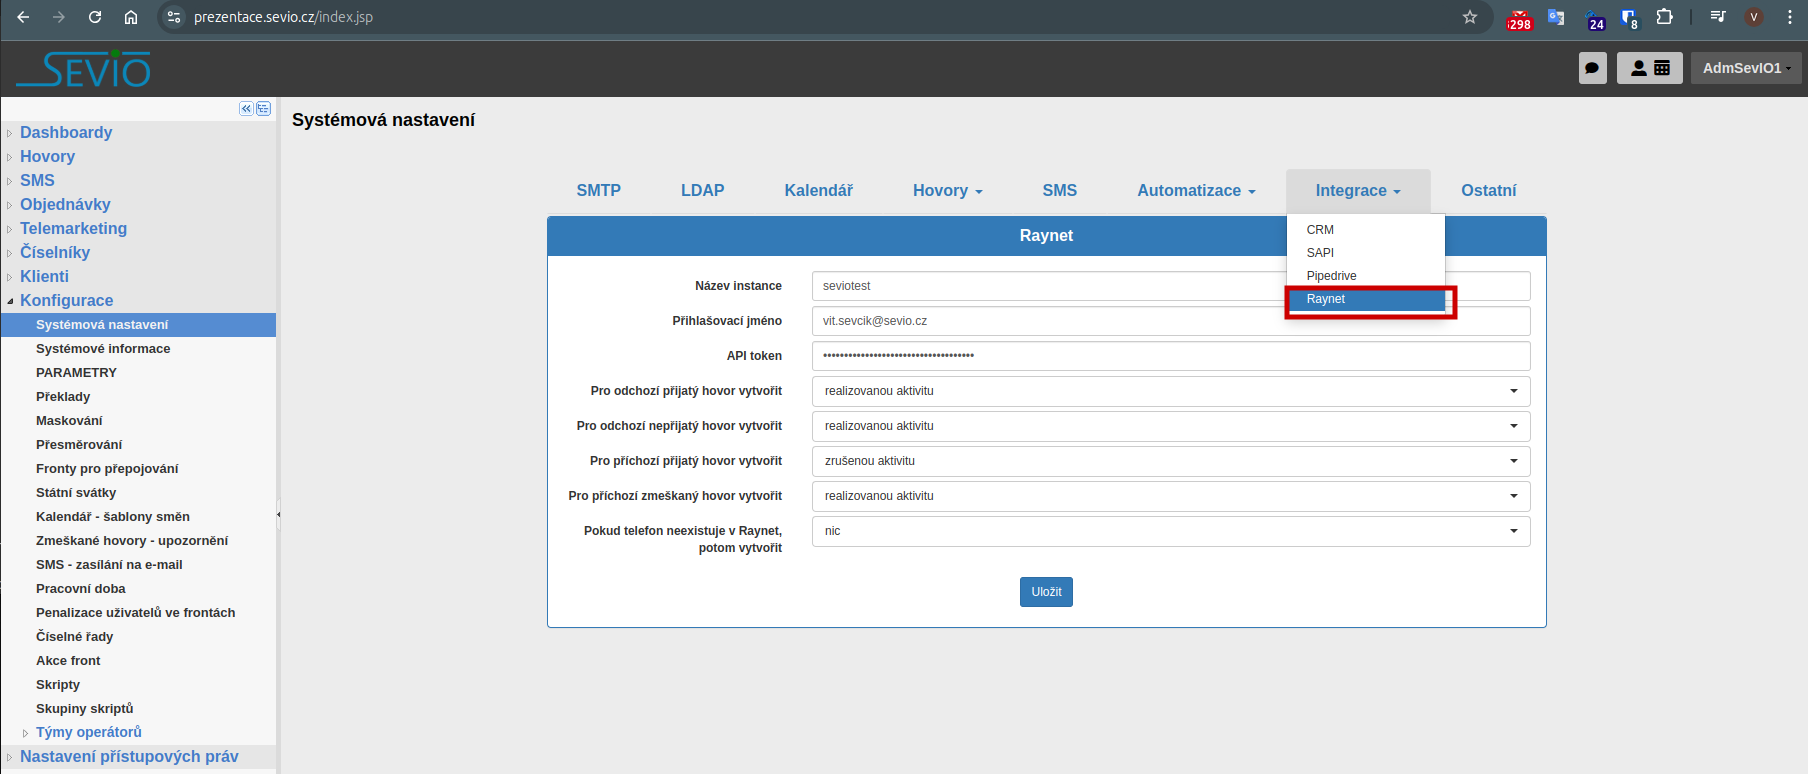
Open SEVIO in a web browser and go to the System Settings, Raynet tab (see the image Opening the Form for Setting Up Raynet CRM Integration in SEVIO).
Then enter the following into the form:
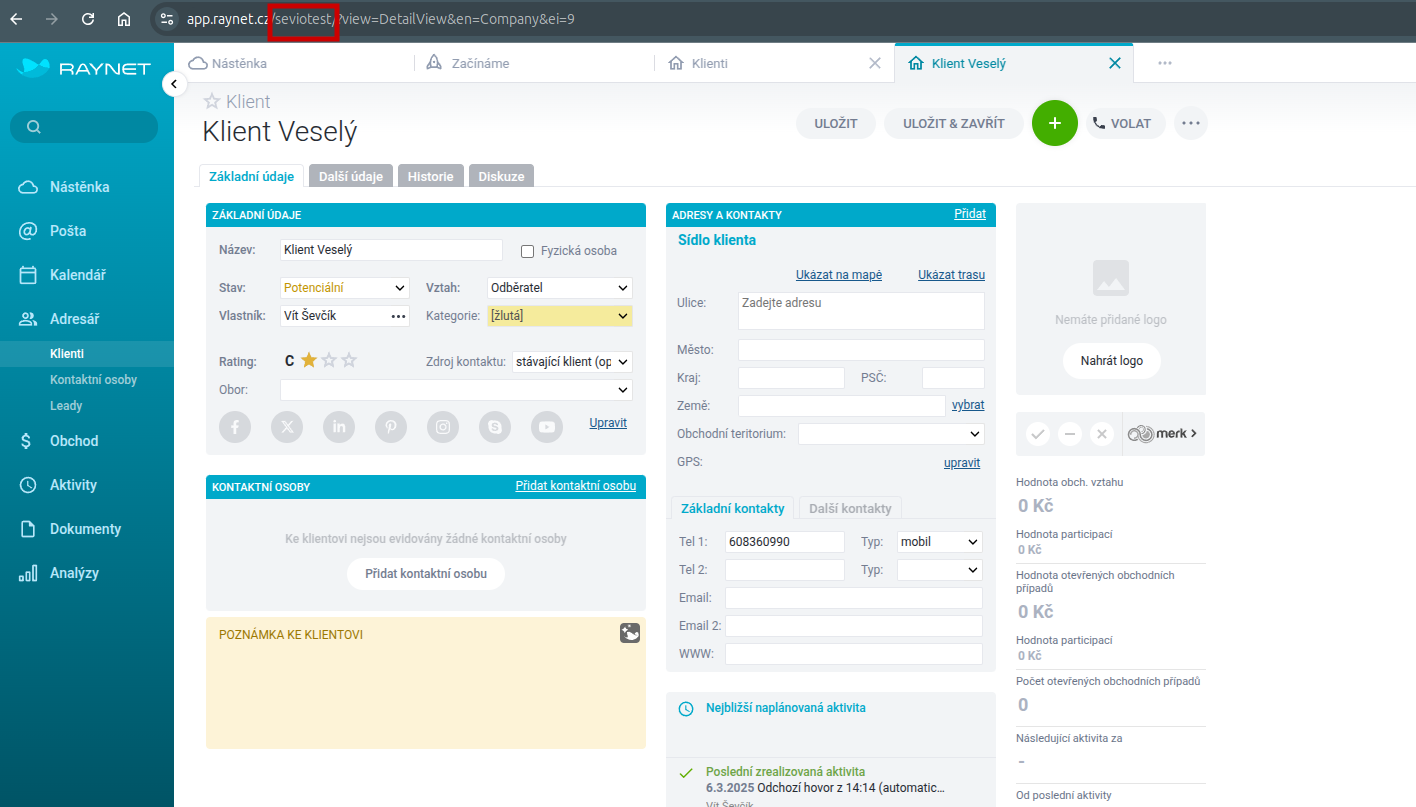
- Instance name: you can find it in the Raynet URL (see the following image Example of the Raynet Instance Name (seviotest))
- Login name: your Raynet login name
- API key: the API key you generated in Raynet; see the previous images
SEVIO also allows you to set which activities should be created in Raynet, or whether nothing should be done. This gives you full control over the integration.
Step 3 - Setup Result
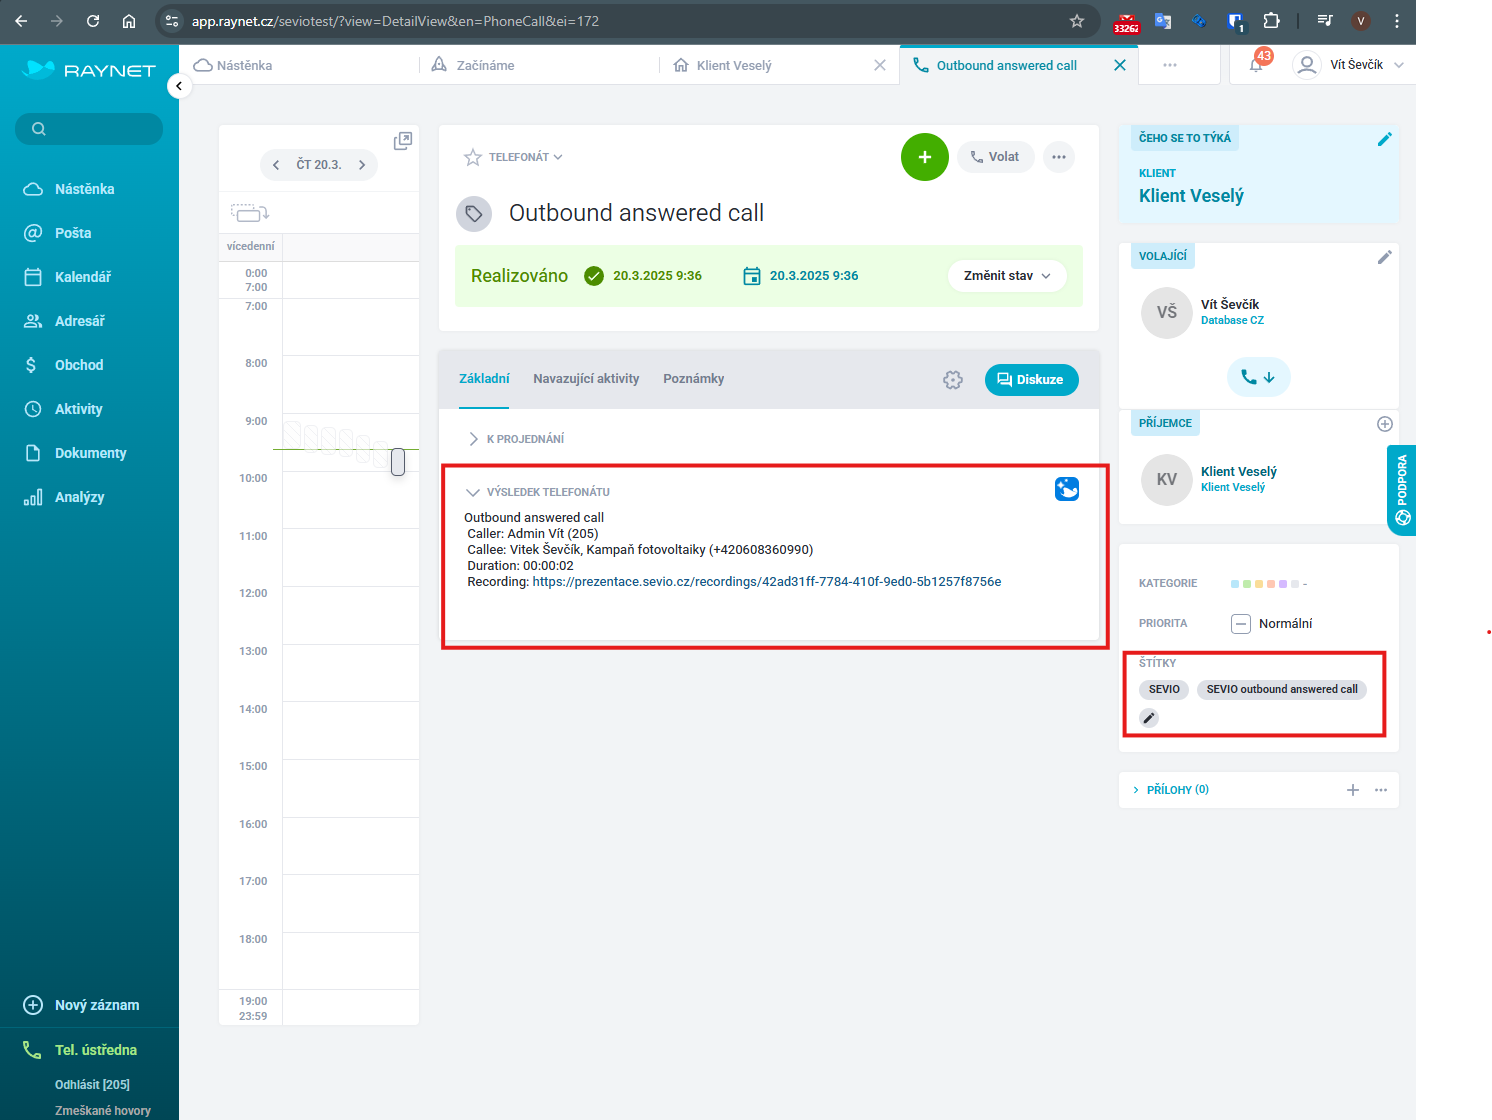
Every completed call is automatically logged in Raynet with the following information:
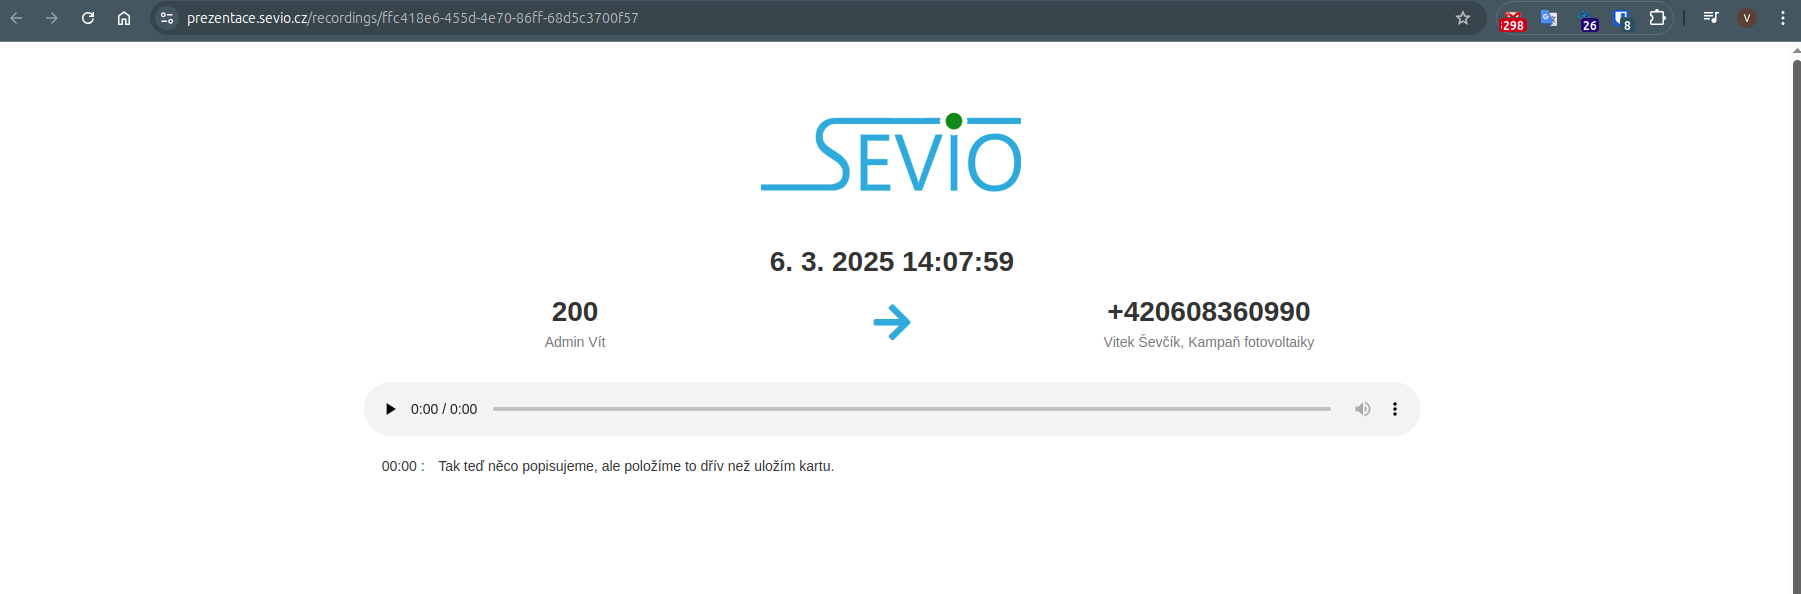
- Call recording link: allows you to listen to the call afterwards.
- Caller identity: records who made the call.
- Tag assignment: calls are automatically assigned to the relevant tags, making them easier to filter (for example, by scheduled or generated calls).
- Call transcription: if available, the recording link also provides access to an automatic text transcription of the call.
This functionality allows Raynet users to manage and search calls more efficiently according to specific criteria.
Correct Login Order for the Phone System in Raynet CRM
To work with the phone system without any issues, log in in the following order:
- First log in to Raynet CRM – here you select the line and queues in which you will work.
- Then log in to SEVIO – use your username and the selected line.
It is important that the line in Raynet CRM and SEVIO is the same.
If you log in to SEVIO first, Raynet CRM will recognize your line as busy and will not allow you to select it from the list of available lines. This would prevent you from working with the phone system.